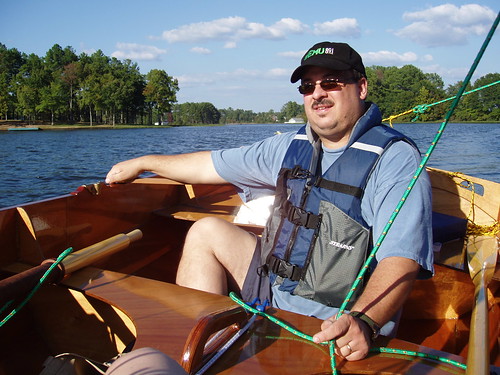
The hull could now be flipped over, and the copper wire stitches removed. The approximately 250 stitches that had been
  painstakingly drilled and twisted have now served their purpose, and were clipped off flush with the hull exterior. The portion of the stitch embedded in the epoxy fillet will remain, but the exterior portion was clipped off. I found it easiest to untwist the tighter stitches a few turns, in order to provide room to slip the small wire cutter under the loop. A word to the safe: wear eye protection! Some of the wire fragments can fly in dangerous directions. With the stitches removed, the hull is now ready for sanding and filling prior to fiberglassing. Total hours 18.50.
Monday, April 28, 2008
Stitch removal


Sunday, April 27, 2008
Carlins
With the deckbeam in place, I next installed the carlins. These are small, flexible pieces of lumber that will form the framework that supports the inner edge of the deck, along the periphery of the cockpit. In contrast to some reports of other builders, I had no problem bending the carlins along the fair curve described by the hanging knees and deck be
 am. Chalk it up to the humidity of spring in the deep south, I suppose. After a bit of trimming and bevelling at the bow end of the carlins, I tested for a tight fit in the notch formed by the blocks on the deck beam. Once everything was ready, I mixed a small amount of mustard epoxy and coated the mating surfaces, the returned the carlins to position and clamped in place. At the bow, I clamped a piece of scrap to wedge the two carlin ends snugly against the deck beam notch. Total hours 17.50.
Saturday, April 26, 2008
Deckbeam
Installation of some structure to support the deck came next. The position of the deckbeam was measured relative to the forward bulkhead. The pair of arched, precut plywood pieces had been previously epoxied together, forming a strong beam unit. Holding the piece in place, the ends were marked and cut, then bevelled and planed until they fit snugly in place between the sheer clamp in the correct position. Pilot holes were drilled and countersunk for #8, 1-1/2" bronze screws to hold the beam in place. Next, the centerline was measured by dividing the beam by two. This matched well with the centerline position given by a string stretched from bow to stern on the hull. From the plans, the position of the wood blocks were marked on the deck beam, and these were also drilled and screwed into place. Once everything fit satisfactorily, it was all disassembled. Some mustard epoxy was mixed with silica, and the parts were coated at the joint faces. The beam and then the blocks were screwed back into place. I had intended to install the carlins as well, but decided to let the deck beam parts cure before that. Besides, I only have two bar clamps, and will need two more to do the carlins... Total hours 17.00.
 sheer clamp in the correct position. Pilot holes were drilled and countersunk for #8, 1-1/2" bronze screws to hold the beam in place. Next, the centerline was measured by dividing the beam by two. This matched well with the centerline position given by a string stretched from bow to stern on the hull. From the plans, the position of the wood blocks were marked on the deck beam, and these were also drilled and screwed into place. Once everything fit satisfactorily, it was all disassembled. Some mustard epoxy was mixed with silica, and the parts were coated at the joint faces. The beam and then the blocks were screwed back into place. I had intended to install the carlins as well, but decided to let the deck beam parts cure before that. Besides, I only have two bar clamps, and will need two more to do the carlins... Total hours 17.00.
Monday, October 29, 2007
Bulkhead fillet
With the hull seams filleted and taped, I next turned to the bulkheads and hanging knees. These were filleted with peanut butter thickened epoxy, with the bulkheads being  filleted on both sides. This will give great strength to the hull, and will also form watertight compartments in the bow and stern. To apply the fillets as neatly as possible, I used a gallon zip lock bag with a small hole snipped in one corner (after it had been reinforced with clear packing tape) as a sort of piping bag such that a pastry chef might use to decorate a cake. This allowed me to lay down a controlled bead of epoxy at each joint, which was then smoothed into rough shape with the rounded edge of a large tongue depressor. After allowing the epoxy to partially set up, I returned and gave it a final smoothing with a gloved finger wetted in alcohol. This gives nice smooth fillets that will require less sanding later on. Total hours: 16.00.
 filleted on both sides. This will give great strength to the hull, and will also form watertight compartments in the bow and stern. To apply the fillets as neatly as possible, I used a gallon zip lock bag with a small hole snipped in one corner (after it had been reinforced with clear packing tape) as a sort of piping bag such that a pastry chef might use to decorate a cake. This allowed me to lay down a controlled bead of epoxy at each joint, which was then smoothed into rough shape with the rounded edge of a large tongue depressor. After allowing the epoxy to partially set up, I returned and gave it a final smoothing with a gloved finger wetted in alcohol. This gives nice smooth fillets that will require less sanding later on. Total hours: 16.00.
Wednesday, October 10, 2007
Bow fillet and tape
 After a brief hiatus for a trip out of town, building of the Mill Creek 16.5 resumed. Today's job was the fillet and taping of the bow compartment. With a now familiar procedure, the joints were filleted with peanut butter thickened epoxy, followed by a fiberglass tape overlay. This was then wetted down with the layer of unthickened epoxy. Doing a neat, smooth job was difficult, especially in the very tip of the bow, for one such as me with less than dainty hands. But tight quarters notwithstanding, the joints were sealed and glued, thus completing the preliminary gluing of the hull. Total hours 15.25.
Tuesday, October 2, 2007
Cockpit tape, part II
 Today I completed filleting and taping the joints on the port side of the cockpit area. Even after the practice of the starboard side, the identical job tonight went no faster. It is tedious work to get the epoxy fillets in place with reasonable neatness, overlay the tape, and wet it down with epoxy and then smooth wrinkles and remove air bubbles from under the tape. However, the job is done. While others may be able to produce neater fillets, mine should look decent under the painted finish I have in mind for the interior of this copy of the Mill Creek 16.5. Total hours: 14.25.
Sunday, September 30, 2007
Cockpit tape, part I
I tackled the filleting and taping of the cockpit today. Or tried to- things w ent slower than I had expected, so I ended up just doing the starboard side of the boat. As previously, a fillet of thickened peanut butter epoxy was laid down on the joint between each panel. I then overlayed the fillet with glass tape I had previously cut to length. Each side required three lengths of tape to fit between the hanging knees on the upper joint between the sheer panel and the bilge panel. I cut the lower tape in one piece, and merely cut a notch to accommodate the lower edges of the hanging knees. After getting the tape in place, I wetted it down with unthickened epoxy. This took a surprisingly long time, as I worked to get all the air bubbles and wrinkles out of the tape. Total hours: 13.00.
 ent slower than I had expected, so I ended up just doing the starboard side of the boat. As previously, a fillet of thickened peanut butter epoxy was laid down on the joint between each panel. I then overlayed the fillet with glass tape I had previously cut to length. Each side required three lengths of tape to fit between the hanging knees on the upper joint between the sheer panel and the bilge panel. I cut the lower tape in one piece, and merely cut a notch to accommodate the lower edges of the hanging knees. After getting the tape in place, I wetted it down with unthickened epoxy. This took a surprisingly long time, as I worked to get all the air bubbles and wrinkles out of the tape. Total hours: 13.00.
Saturday, September 29, 2007
Fillet and Tape
The construction of Dragonfly has now progressed to the "glue" portion of "stitch and glue" boatbuilding. First, a final check of the hull's alignment showed that everything was in place. Using a technique called "winding", the hull was checked for twist by placing two straight pieces of wood across the sheerclamps, and then sighting down the centerline. With the two pieces of wood superimposed, the hull showed no twist. The point of the bow and stern were plumb, and all appeared in readiness to permanently joint the parts of the hull with epoxy and fiberglass.
 The first step is to apply a fillet of wood flour thickened epoxy to the joints which will provide a smooth radius for the fiberglass tape to come. The epoxy is mixed t0 peanut butter consistency, which makes it reasonably easy to apply with a wood tongue depressor, then smooth with a rubber spatula cut to the appropriate radius. The only difficulties I ran into was the fillet on the joint between the sheer panel and the bilge panel. Near the stern, this joint had almost no angle (or a 180-degree angle), which made a clean fillet more difficult.
With the fillets in place, and before they cured, I overlayed them with strips of 3" wide fiberglass tape. The tape was then wetted down with unthickened epoxy to form an integral, strong joint. At an ambient temperature of 85 degrees, the slow-cure epoxy is setting up fairly quickly, so the boat is done in sections; today I did the stern behind the aft bulkhead. Tomorrow- the bow and center compartments. Total hours: 11.75.
Tuesday, September 25, 2007
Hanging knees
Tonight's simple task was to wire in the hanging knees. On the Mill Creek 16.5, there  are two pairs of these angle braces, which will later support the carlin and the deck. My first trial fitting was a great disappointment, until I realised the two pair of knees are shaped differently. I'm sure this is mentioned in the instruction book, but I seemed to have glossed over that. Once I fitted the correct knee in each location, they fit beautifully. I used four copper wire stitches for each knee, and made sure each was square to the hull side and to the bottom panel. After some further stitch tightening and truing of the hull, the interior will be ready for epoxy and fiberglas. Total hours: 10.50.
 are two pairs of these angle braces, which will later support the carlin and the deck. My first trial fitting was a great disappointment, until I realised the two pair of knees are shaped differently. I'm sure this is mentioned in the instruction book, but I seemed to have glossed over that. Once I fitted the correct knee in each location, they fit beautifully. I used four copper wire stitches for each knee, and made sure each was square to the hull side and to the bottom panel. After some further stitch tightening and truing of the hull, the interior will be ready for epoxy and fiberglas. Total hours: 10.50.
Sunday, September 23, 2007
Bow and bulkheads
Something I have learned early on in boatbuilding is that timelines quickly fall along the wayside. I had hoped to finish today everything needed in order to begin the epoxy-and-fiberglass tape gluing of the hull tomorrow. But after today, that looks like a day or two away.
 timelines quickly fall along the wayside. I had hoped to finish today everything needed in order to begin the epoxy-and-fiberglass tape gluing of the hull tomorrow. But after today, that looks like a day or two away.
 I first fashioned a spacer to prop the hull at its widest spot to the proper beam of 33". Lacking a single piece of lumber long enough, I clamped two scraps from the sheer clamps together. This telescoping arrangement made it easy to make adjustments until the correct beam measurement was obtained.
N ext, I ran a string from bow to stern, and used it to trim the bevels in the sheer clamps that would allow the pointed bow shape. Using a tip from the CLC web site, I ran a screw in the bow to hold things together temporarily. The string gave me a centerline along which to measure the positions for the bow and stern bulkheads. After placing them and making sure they were square to the bottom panel and the hull centerline, I drilled some holes and wired them into place. The stern bulkhead required some creative measuring, as it had a bit of "character", that is, a slight warp. But clamping a short piece of 1 x 4 straightened it out, and it was wired into place.
 ext, I ran a string from bow to stern, and used it to trim the bevels in the sheer clamps that would allow the pointed bow shape. Using a tip from the CLC web site, I ran a screw in the bow to hold things together temporarily. The string gave me a centerline along which to measure the positions for the bow and stern bulkheads. After placing them and making sure they were square to the bottom panel and the hull centerline, I drilled some holes and wired them into place. The stern bulkhead required some creative measuring, as it had a bit of "character", that is, a slight warp. But clamping a short piece of 1 x 4 straightened it out, and it was wired into place.
All this took longer than I expected. A light rain fell, which served only to make things more humid and unpleasant. So today's session was a relatively short one; more hull alignment, stitch tightening, and placement of the hanging knees next time. Since this is all a crucial part of getting a fair hull, there is no need to rush things. Total hours: 9.50.
Saturday, September 22, 2007
Sheer panel stitch
After  scribing a line on the lower (opposite sheer clamp) edge of the sheer panel, stitch holes were drilled every 4" along the line. The two panels were stacked back to back to halve the number of drills. I also used my block plane to round the mating edges slightly of the two panels to reduce the tendency of the edges to slip off each other. Then the panels were loosely stitched onto the previously stitched bilge panels. This session went a little easier, since I had an assistant. As the two panels came together at the stern, I fitted in the two bulkheads just to throw the hull into rough shape. Coming next- trimming the sheer clamps at the bow and stern to a bevel, and snugging up the stitched to get the hull into close to final shape. Total hours: 8.00.
 scribing a line on the lower (opposite sheer clamp) edge of the sheer panel, stitch holes were drilled every 4" along the line. The two panels were stacked back to back to halve the number of drills. I also used my block plane to round the mating edges slightly of the two panels to reduce the tendency of the edges to slip off each other. Then the panels were loosely stitched onto the previously stitched bilge panels. This session went a little easier, since I had an assistant. As the two panels came together at the stern, I fitted in the two bulkheads just to throw the hull into rough shape. Coming next- trimming the sheer clamps at the bow and stern to a bevel, and snugging up the stitched to get the hull into close to final shape. Total hours: 8.00.
Wednesday, September 19, 2007
Stitching
After some prep work last night, I began stitching panels onto the bottom of th e hull. The first, or bilge panel, is attached by a series of copper wire twist ties inserted through small holes running along the edge of each panel. Last night, I cut coils of copper wire into 4" lengths and folded them around a felt tip marker. Then, a line was scribed along each edge of the bottom panel 3/8" inside the edge. For that, I fashioned a pencil with a paperclip guide. Then along this line, 1/16" holes were drilled every 4" in advance of stitching. Finally, the edge of the panel was rounded slightly by a quick pass with a block plane, f
 ollowing a CLC tip. This will allow less shifting of the panels' corners as they are fastened together.
 e hull. The first, or bilge panel, is attached by a series of copper wire twist ties inserted through small holes running along the edge of each panel. Last night, I cut coils of copper wire into 4" lengths and folded them around a felt tip marker. Then, a line was scribed along each edge of the bottom panel 3/8" inside the edge. For that, I fashioned a pencil with a paperclip guide. Then along this line, 1/16" holes were drilled every 4" in advance of stitching. Finally, the edge of the panel was rounded slightly by a quick pass with a block plane, f
 ollowing a CLC tip. This will allow less shifting of the panels' corners as they are fastened together.
Stitching would have been best done with a helper, but since I was working solo tonight, I made use of some nylon straps to hold the panel in place while I got enough stitches in it to stabilize it. All the stitches are loose for now. After the sheer panel is attached and the beam properly spaced, then the stitches can be tightened and the fairness of the hull can be adjusted. Total hours: 6.25.

Saturday, September 15, 2007
Sheerclamps
The first ord
 er of business today was to create some more clamps that would be used in attaching sheerclamps to the sheerstrake. The length of the boat would require more clamps than I had on hand, even after building a Passagemaker dinghy. To supplement my supply, I used a tip from the CLC page, and made clamps from 4" Schedule 40 PVC pipe. The pipe was cut in 1.5" segments, which were then split to create an inexpensive yet useful clamp. In about an hour, I was able to turn out about 30 additional clamps.
The bottom panel was scarfed together, using the same technique as described yesterday for the side panels. The panel was masked
 on either side of the joint with clear packing tape, then the scarf joint was coated with silica-thickened epoxy. The two pieces of the panel were joined and the panel aligned before being weighted with 2-1/2 gallons of Eipersbräu minikegs.
Next, the sheerclamps were attached to the sheer panel. Careful consultation of the instruction manual was required to make sure the sheerclamp was attached to the correct edge of each panel. The edge was coated with thickened epoxy, the clamps placed and aligned, then clamped down and epoxy drips were wiped up. This completes the prep work of hull parts; stitching of the hull is the next task. Total hours 3.50.
Friday, September 14, 2007
Scarf
Tonight begins the building process. As with almost all kits from Chesapeake Light Craft, the building pr ocess begins with the scarfing of some parts. Scarfing refers to the joining together of small parts to make larger ones. In this case, the side panels of the 16-foot-long boat must be comprised of smaller parts cut from 8-foot-long plywood sheets. The plywood can be joined with epoxy to which silica powder has been added to increase strength. In researching the building of a Mill Creek kayak, I read WoodenBoat magazine #136 (May/June 1997), the first in a two part series focusing on building the Mill Creek. By happy coincidence, the same issue contains an article by Greg Rössel on scarf joints.
I started by wrapping the area adjacent the beveled ends of the panels with c lear packing tape, which will protect from epoxy spreading outside the joint. The bevelled ends come in the kit pre-cut, which is very convenient. These are cut at an 8:1 ratio, meaning the bevel surface is 8 times as long as the thickness of the plywood. This falls within the recommended range of the WoodenBoat article which suggests going even to 12:1. To epoxy the ends, I coated each surface with unthickened epoxy, allowing it to soak into the end grain. I then coated each joint with epoxy thickened with silica to mustard consistency. Using a sheet of plastic to separate each panel and prevent them sticking together, I stacked corresponding bilge and sheer panels on each other, and weighted down the joint. To get the correct alignment of the panel, a string was run from one end to the other, and the panels adjusted until the specified distance to the arch of the panel was achieved. The scarfing process was also repeated with the sheerclamps, which will form the attachment point for the joint between the deck and the hull. The epoxy will be allowed to cure overnight, in a shop that is now at about 80 degrees F. (Total hours: 2.00)
Wednesday, September 12, 2007
All present and accounted for
Armed with the comprehensive instruction book and component list, I unpacked and went through the kit parts for the Mill Creek 16.5 that will be known as "Dragonfly". All parts are present and accounted for, with the possible exception of the cockpit coaming nose block. This is a small piece that I suspect is within the box of seat parts, and its multitude of seat slats. I didn't unpack all of that, but will leave it for when I am ready for that step. A couple of the side panel scarf edges came uncovered while I unpacked, but the delicate bevelled edges all are intact, ready for the scarfing process.
Tuesday, September 11, 2007
Delivery
A large, flat, 81-pound box was delivered today, after a long journey from Maryland. It now resides safely in the garage, while I study the construction book. A careful inventory of parts follows soon, and then construction begins!
Wednesday, September 5, 2007
Almost here...
After several rounds of phone tag, I finally managed to speak with someone from the shipping company, and we have an appointment for delivery tomorrow of one piece of freight: weight- 81 lbs.
Thursday, August 30, 2007
A little birdie tells me...
Word on the street is that a shipment of marine plywood parts, epoxy, and other materials is presently on its way from Annapolis, MD to a small "boat shop" in the Heart of Dixie. This will be just another step in a long journey for this boat-to-be. From trees grown in Guinea and other spots on western coastal Africa, marine-grade plywood was milled in France to quality standards set by Lloyd's of London, then shipped to a company on America's east coast. There, the plywood was cut by a huge, new computer-controlled machine to precise specifications. The collection of oddly shaped parts was then packaged up and loaded on a plane which is now on its way to Helena, Alabama, just south of Birmingham. Continue reading to see what happens next!
Saturday, August 25, 2007
Mill Creek 16.5 video
As the delivery date nears, here is a short video showing what my finished product should look like.
Thursday, July 5, 2007
Commitment
 At the WoodenBoat Show in Mystic, CT this past weekend, I handed a check to John C. Harris to cover the purchase of a Mill Creek 16.5 kit. The CEO of Chesapeake Light Craft graciously agreed to defer the delivery of the kit until late August. This will give me time to finish clearing out the boatbuilding shop, and attend to some other home improvement projects. By the first week in September, I should be able to turn my full attention to the job of creating my very own copy of the Mill Creek. Until then, the anticipation grows...
Subscribe to:
Posts (Atom)